How to easily share your MacBook screen with other users
 How to quickly and easily share your MacBook screen with others (Illustrative photo: Getty Images)
Regardless of whether you're using Zoom, Skype, Teams, or other video conferencing apps, the screen-sharing feature is one of the most in-demand functions.
The leading global site for technology and life hacks, Lifehacker, explains how to easily and quickly share your MacBook screen.
DeskPad is a free app for Mac that creates a virtual second monitor in a separate window. The idea is to move your presentation software to this display and share it while using the rest of your real screen to view your notes and chat stream.
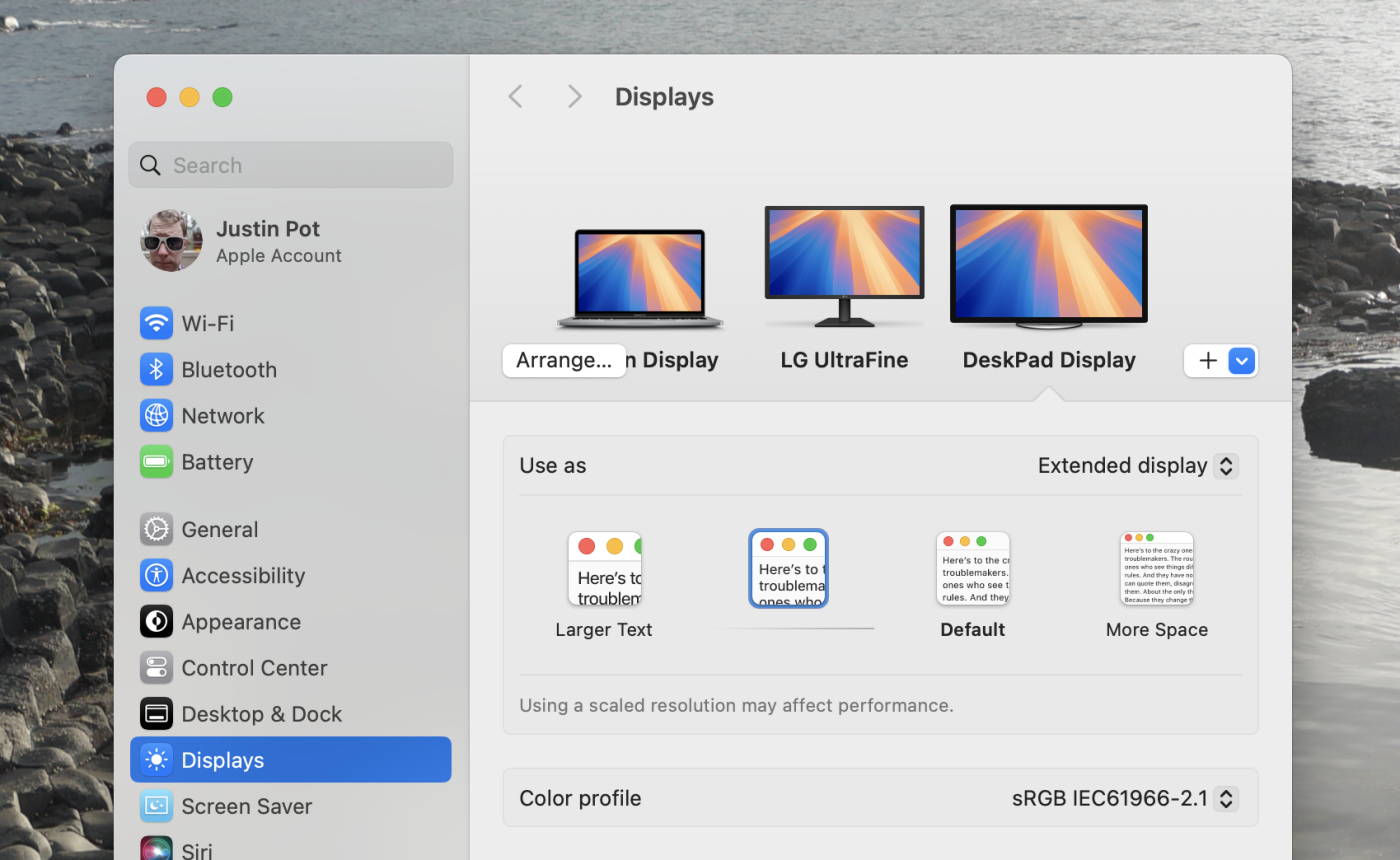
The app is easy to use: install and open it, and you’ll see a window showing your full Mac desktop. This is a simulated display - you can even adjust it in System Preferences.
Here, you can adjust the display resolution - lower it if your presentations tend to lag. You can also click the Arrange button to decide which side of the screen to move your mouse to enter the virtual display.
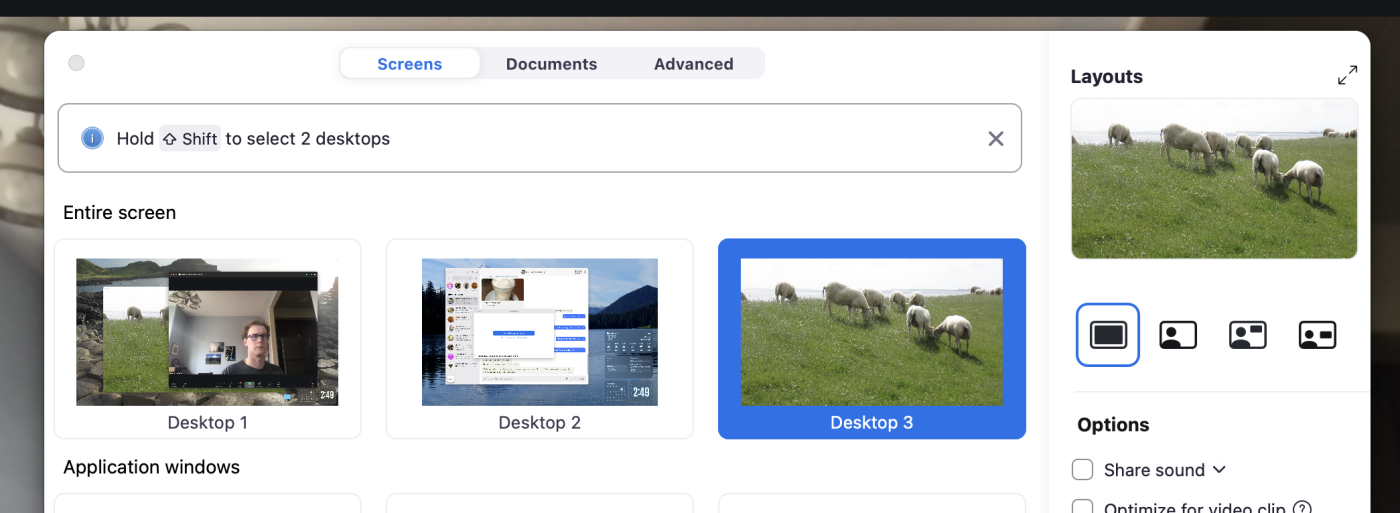
Next, you can prepare for your presentation. Place your presentation software on the virtual DeskPad display and set it to full-screen. Then, when you share your screen in Zoom or similar software, select the DeskPad display.
Zoom will broadcast the entire virtual display as if it were real. Now, you can arrange your screen however you like. With the presentation in full-screen mode on the DeskPad window, you can place your notes and anything else in separate windows.

Screen sharing on MacBook using DeskPad (photo: Lifehacker)

Screen sharing on MacBook using DeskPad (photo: Lifehacker)

